The first frost was last night, Tuesday. I picked peppers again last night because I didn’t want to lose them to the frost. This has been an amazing year for peppers. I have never had so many red ones to put in your shares. I planted an abundance of pepper plants this year because I have been frustrated in previous years with the lack of ripe peppers. I have not had time to check to pepper plants to see if they were damaged by the frost. There will be more in your shares next week if they weren’t damaged.
What an amazing fall we are having! The weather has been perfect for the fall crops; lots of sunshine and cool temperatures with adequate moisture. The broccoli plants are coming along nicely, but we might not have cauliflower before the season ends. The plants are growing very slowly, as everything does this time of year. It’s possible we may have to wait a couple of weeks for the cauliflower, like last year. It wasn’t until the second week of November that the cauliflower and broccoli were ready so I added another pick up after the season ended. It’s possible I will have extra onions and potatoes for sale on the last pick up, October 28th. More on that later, but they will probably be in 2 and 3 pounds bags, at $2.00 per pound.
It has also been a great year for potatoes. There are two kinds in your share this week, German Butterball and Bintje.
Lettuce Winter Density, a romaine
Kale Cavolo Nero, also known as Tuscan Kale or Dinasour Kale. This is a very prized kale for it’s great taste, not widely available. Use as any other kale. The center rib should be removed before cooking.
Brussels Sprouts Brussels Sprouts grow on a tall stalk. The sprouts are snapped off the stalk. Last year I gave you the entire stalk, this year I cut them off for you. The end of the sprout needs to be trimmed and the outer leaves removed if they are damaged before cooking. Try roasting the sprouts: toss with olive oil, salt and pepper, and roast on a flat try or cookie sheet at 400 degrees until tender and a little crispy. The sprouts are not all the same size, cut the larger ones in half so that they all roast at the same rate.
Beets Red Ace in large shares, Chioggia (candy stripe beets) in small shares.
Broccoli Raab A member of the same family as broccoli, cabbage, etc. The stems, leaves, and florets are all edible. See a recipe in the newsletter.
Potatoes German Butterball and Bintje
Carrots With tops. Remove the tops if you are storing them for an extended period. The tops will continue to pull moisture from the roots, causing the roots to wilt. The tops are also edible. See " What To Do With Carrot Tops Recipe included in the newsletter for Roasted Carrots.
Peppers Red and yellow bell peppers
Red Onions
Broccoli Rabe with Oil and Garlic
From Lidia’s Italian American Kitchen by Lidia Bastianich
Sometimes you see broccoli rabe cut into little pieces, but I like to serve the whole stems with the leaves attached. If you peel and trim them the way I describe below, the stalks will cook at about the same rate as the leaves. Broccoli rabe is a vegetable I like al dente. By that I don’t mean really crunchy, but with some texture left to it.
1 pound broccoli rabe
3 tablespoons extra-virgin olive oil
2 cloves garlic, peeled and sliced
Salt
¼ teaspoon crushed hot red pepper, or to taste
¼ cup (or as needed) water
Makes 4 servings
To trim the broccoli rabe, first cut off any wilted or yellow leaves and the tough ends of the stems. Then, holding a stem with the florets in hand, nick a little piece of the end of the stem with a paring knife and pull the little piece of the skin toward you, peeling the stem partially. Continue working your way around the stem until it is peeled. As you peel the stem, some of the large, tough outer leaves will also be removed; discard those as well. Repeat with the remaining stems. Wash the trimmed broccoli rabe in a sinkful of cold water, swishing the stems gently to remove all dirt from between the leaves. Let the leaves sit a minute or two undisturbed, to allow the dirt to settle to the bottom of the sink, then lift the broccoli rabe from the water with your hands or a large skimmer. Drain in a colander. Heat the olive oil in a large skillet over medium heat. Scatter the garlic over the oil and cook, shaking the pan, until golden brown, about 1 minute. Carefully lay the broccoli rabe into the oil and season lightly with salt and ¼ teaspoon crushed red pepper. Stir and toss to distribute the seasonings. Pour ¼ cup water into the skillet and bring to a boil. Cover the skillet tightly and cook, lifting the lid to turn the stalks occasionally, until the broccoli rabe is tender, about 10 minutes. Taste, and season with additional salt and crushed red pepper if necessary. Serve hot.
Roasted Carrots
Serves 4 to 6. Published November 1, 2010. From Cook's Illustrated.
1 1/2
pounds carrots , peeled, halved crosswise, and cut lengthwise if necessary to create even pieces (see illustrations in Cutting Carrots for Roasting)
2
tablespoons unsalted butter , melted
Table salt and ground black pepper
INSTRUCTIONS
1. Adjust oven rack to middle position and heat oven to 425 degrees. In large bowl, combine carrots with butter, ½ teaspoon salt, and ¼ teaspoon pepper; toss to coat. Transfer carrots to foil- or parchment-lined rimmed baking sheet and spread in single layer.
2. Cover baking sheet tightly with foil and cook for 15 minutes. Remove foil and continue to cook, stirring twice, until carrots are well browned and tender, 30 to 35 minutes. Transfer to serving platter, season with salt and pepper to taste, and serve.
Thursday, October 14, 2010
Wednesday, October 6, 2010
White House Gardens Week #17, October 7, 2010
Week #17 October 7, 2010
The recent rains provided at least an inch of much needed moisture. The fall crops grow much slower with the cooler temperatures and shorter days. The broccoli and cauliflower are progressing nicely, and Brussels sprouts will be in your share next week. I would rather pick the Brussels sprouts after a frost, which makes them sweeter, but they are ready now. Most of the crops I will be harvesting in the next 3 weeks are covered with row cover to keep the deer from helping themselves to a salad buffet.
The deer will begin to move out of the woods with the cooler temperatures, especially if we get a frost and there is nothing left for them to eat. I have tried many ways to keep them out of the garden, unsuccessfully. The row cover does a good job of “hiding” the crops from the deer . The last 3 shares will probably include broccoli, cauliflower, lettuce, kale, beets, fennel, chard, turnips, broccoli raab, carrots, potatoes, and onions. Hopefully we will have a warm, dry October to help these crops along.
Lettuce Winter Marvel, a butterhead
Arugula Not in all shares
Sweet Pepper s Long, red Carmen, my favorite. Try making Pureed Red Pepper & Potato Soup from Recipes For Health or see the recipe from Denny Archey in the previous email I sent.
Lima Beans These are fresh, in the shell limas. Try to shell them as soon as possible. Shell them and cook them soon, or store in the frig in their shell for a short time. They are at their best when cooked and eaten soon. This was my first attempt at growing limas, and I think I will do it again. The plants were beautiful, but the beans take a long time to mature. Some of the pods may have large beans and some may not have much at all. (Think baby limas) They are not easy to shell: try snapping off the tip and pulling the “string” down on both sides, which should help to open the pod easier. I have cooked them several times and my favorite method is to steam/sauté them. Put the shelled beans in a skillet, add enough water just to barely cover, salt, and a tablespoon of butter. Bring to a boil, reduce the heat, and cook, covered, until barely tender, about 8 minutes. Remove the cover, turn up the heat, and boil away the water until the beans are completely tender.
Potatoes Rio Grande Russet and Adirondak Red. Most of the russets are small, a result of not being able to keep the potato plants healthy and free of disease for the entire growing season. Russets are good for baking. Adirondak Red has red skin and pinkish-red flesh which is a result of naturally occurring anthocyanin pigments, chock full of anitoxidants. Its color fades when boiled, but remains when roasting, baking or frying.
Kale Red Russian variety. See previous newsletters for recipes. Or try freezing kale and other greens to use during the winter. See a recipe from shareholder Pat Brannon for freezing greens in the newsletter.
Onions Yellow onions for cooking
Delicata or Acorn Squash Delicata has mulit-colored skin, Acorn is dark green. Both can be used in recipes calling for winter squash, however the skin of the delicata is edible, the acorn is not. I like to roast winter squash, either cut in half or cubed. Scoop out the seeds and roast, cut side down, at 400 degrees until tender. Baste with melted butter, sprinkle with brown sugar, and broil until browned. Or cut into cubes and add to potatoes, onions, peppers, toss with olive oil, S & P, and roast at 400 degrees until tender.
Freezing all kind of greens…
Debbie asked me to share with you a simple method for freezing greens. This week we have mustard greens in our box, but you can freeze any type of greens, even those tops from turnips, kohlrabi and beets. These make a pleasing addition to winter stews and soups, especially those minestrones.
If you are freezing the greens from beets or other roots vegetables, cut the greens from the root while they are crisp and fresh. Young tenders greens yield the best results, so start with the freshest possible.
Fill your sink or a bowl with cold water and give the greens a good rinse.
Remove the toughest portion of the stems. You can freeze the stems, but chop them first and set aside.
Fill a 4 quart pot about 2/3 full with water and bring to a boil. If you are saving the stems, throw them into the pot first and wait about 1 minute before adding the greens. Add the greens and cover the pot. Now watch the clock! For all except collard greens, blanch for blanch for an additional 2 minutes. For collard greens, blanch 3 minutes.
If you have lots of the same type of greens you can use the same blanching water several times, adding more hot water from the tap from time to time to maintain the water level.
While the greens are blanching prepare a large bowl with ice and cold water.
Using a slotted spoon or strainer with a handle, quickly remove the greens from the pot and transfer to the ice bath for about 2 minutes.
Drain well. You can gently squeeze the excess water from the greens, but be gentle, as to not crush those tender greens.
I use quart size, freezer zip loc bags, removing as much air from the bag as possible before zipping. Be sure to label the bag so you remember what kind of greens you have blanched. Once they are frozen, all they will all look the same!
Thursday, September 30, 2010
White House Gardens Week #16, September 30, 2010
Sometimes I think the only reason I grow all these vegetables, is so I can share recipes with you. There were so many choices this week from my many saved recipes, that I had to make a decision about what to leave out! Stewed peppers, collard greens cooked with bacon, (use the leaf beet if you didn’t get collards), Butternut Squash Gallette, refried beans. Like I have said before, this is my favorite time of year. I love the crops that are coming in now: kale, collard greens, kohlrabi, broccoli, cauliflower, beets, winter squash; the list goes on and on.
Thank you Denny and Nancy Archey for helping again this evening. They love to pick peppers! The peppers are overflowing this year. I planted quite a lot because previous years have been very lean in producing colored peppers, which are actually ripe peppers. Green peppers are not ripe! This year was a bumper crop, due to the hot weather. Colored peppers contain lycopene , an antioxidant that protects against cancer like blueberries, tomatoes, and other brightly colored vegetables. Enjoy them raw, cut them up and freeze them to use in cooked preparations this winter, make soup (next week’s newsletter), stuff them, fry them, roast them, or make Stewed Peppers from Recipes For Health by Martha Rose Shulman. I have referred you to her column in the New York Times many times. She has published a cookbook, The Very Best Of Recipes for Health: 250 Recipes and More from the Popular Feature on NYTimes.com , based on this column, and I definitely believe it is worth purchasing. I plan on making the Stewed Peppers and serving it over polenta. Yes, I am overloading you with peppers, but they contain just as much if not more Vitamin C than oranges, so eat them for breakfast, lunch, and dinner!
Kohlrabi White or red in your share. Can be eaten raw or cooked. Peel before eating. My brother-in-law loves to grill thick slices of kohlrabi! The greens are also edible, raw or lightly sauted.
Beets Not in all shares. If you didn’t get beets, then you got Leaf Beet (see below) Chioggia or Red Ace. Best served roasted: cut off tops and wrap roots in foil. Bake at 400 degrees for 30-60 minutes, depending on the size, until tender. When cool enough to handle, peel skin, slice, and toss with olive oil, balsamic vinegar, salt & pepper. Saute the greens in olive oil and add to the roasted roots for a complete salad.
Shell Beans Tongue of Fire. You are probably tired of shelling beans, and this is the last of them, I promise. Store in the frig in the shell but shell them as soon as possible. (Do it in front of the TV!) Store shelled beans in the frig or cook them and store them in the freezer for use this winter in soups. DON’T EAT THEM RAW! Some fresh beans (cannellini, kidney, broad beans) contain a natural toxin that will make you very sick if not cooked first. To cook the beans for freezing: rinse the beans to remove any debris/dirt from shelling them, put in a heavy pot, cover with water by about 2 inches, add aromatics like garlic, rosemary, thyme, or sage, bring to a boil, reduce heat and simmer for 30-60 minutes, until tender, but not mushy. Add more liquid if necessary during the cooking process. Remove from the heat and add a couple of tablespoons of olive oil, and salt to taste. Let the beans cool. They should be saucy, not dry. Store in the freezer and use in recipes that call for dried beans, but guess what?, you have beans already cooked in the freezer, ready to use! Also see this recipe from Dad Cooks Dinner.
Sweet Peppers Yellow and red block peppers. Also green cubanelles. See above for tips on using sweet peppers. Cubanelles are sweet, but can be a little spicey sometimes. It depends on the particular pepper! Use them raw, stuffed, roasted whole.
Radishes Cherry Belle
Heirloom Tomatoes Brandywine, Goldie, Pruden’s Purple and/or Yellow Brandywine. May be the last, we’ll see if the weather holds out. The heirloom tomatoes actually held up better than the hybrids against the many blights that tomatoes are susceptible to.
Leaf Beet Related to beets and Swiss chard. Can be used like spinach in any recipe. Also called Gator, Perpetual Spinach. Enjoy raw or lightly sauted in olive oil with garlic, salt & pepper.
Collard Greens Only in large shares. Usually tough and long cooking, these collard greens are young and tender. Remove the stems before preparing. See a recipe for Collard Greens and Bacon in the newsletter.
Butternut Squash This year’s winter squash crop is very minimal. I have a terrible problem with squash bugs (stink bugs) that eat the young seedlings and the mature fruit! See the newsletter for recipes for Winter Squash Soup and Butternut Squash Gallette.
Thyme and Sage
Collard Greens with Red Onions and Bacon Gourmet | December 1995
Yield: Serves 8
1/2 pound sliced bacon, cut crosswise into fourths
3 medium red onions, chopped coarse (about 3 cups) 1 1/4 cups chicken broth 1/4 cup cider vinegar 2 tablespoons firmly packed dark brown sugar, or to taste 1/2 teaspoon dried hot red pepper flakes, or to taste 4 pounds collard greens (preferably small leaves), coarse stems and ribs discarded and leaves and thin stems washed well, drained, and chopped coarse
In a deep heavy kettle cook bacon in 2 batches over moderate heat until crisp and transfer to paper towels to drain. Pour off all but about 3 tablespoons drippings and in drippings remaining in kettle cook onions, stirring occasionally, until browned slightly and softened. Transfer onions with a slotted spoon to a bowl.
To kettle add broth, vinegar, brown sugar, red pepper flakes, and about half of bacon, stirring until sugar is dissolved. Add about half of collards, tossing until wilted slightly, and add remaining collards, tossing until combined. Simmer collards, covered, 30 minutes. Stir in onions and simmer, covered, 30 minutes more, or until collards are very tender.
Serve collards topped with remaining bacon.
Butternut Squash and Caramelized Onion Galette
For the pastry: 1 1/4 cups all-purpose flour 1/4 teaspoon salt 8 tablespoons (1 stick) unsalted butter, cut into pieces 1/4 cup sour cream 2 teaspoons fresh lemon juice 1/4 cup ice water
For the filling: 1 small butternut squash (about one pound) 2 tablespoons olive oil 1 to 2 tablespoons butter (if you have only non-stick, the smaller amount will do) 1 large onion, halved and thinly sliced in half-moons 1 teaspoon salt Pinch of sugar 1/4 teaspoon cayenne, or to taste 3/4 cup fontina cheese (about 2 1/2 ounces), grated or cut into small bits 1 1/2 teaspoons chopped fresh sage leaves
1. Make pastry: In a bowl, combine the flour and salt. Place the butter in another bowl. Place both bowls in the freezer for 1 hour. Remove the bowls from the freezer and make a well in the center of the flour. Add the butter to the well and, using a pastry blender, cut it in until the mixture resembles coarse meal. Make another well in the center. In a small bowl, whisk together the sour cream, lemon juice and water and add half of this mixture to the well. With your fingertips, mix in the liquid until large lumps form. Remove the large lumps and repeat with the remaining liquid and flour-butter mixture. Pat the lumps into a ball; do not overwork the dough. Cover with plastic wrap and refrigerate for 1 hour.
2. Prepare squash: Preheat oven to 375 degrees F. Peel squash, then halve and scoop out seeds. Cut into a 1/2-inch dice. Toss pieces with olive oil and a half-teaspoon of the salt and roast on foil lined (for neatness sake) sheet for 30 minutes or until pieces are tender, turning it midway if your oven bakes unevenly. Set aside to cool slightly.
3. Caramelize onions: While squash is roasting, melt butter in a heavy skillet and cook onion over low heat with the remaining half-teaspoon of salt and pinch of sugar, stirring occasionally, until soft and lightly golden brown, about 20 minutes. Stir in cayenne.
4. Raise the oven temperature to 400 degrees. Mix squash, caramelized onions, cheese and herbs together in a bowl.
5. Assemble galette: On a floured work surface, roll the dough out into a 12-inch round. Transfer to an ungreased baking sheet. Spread squash, onions, cheese and herb mixture over the dough, leaving a 1 1/2-inch border. Fold the border over the squash, onion and cheese mixture, pleating the edge to make it fit. The center will be open.
6. Bake until golden brown, 30 to 40 minutes. Remove from the oven, let stand for 5 minutes, then slide the galette onto a serving plate. Cut into wedges and serve hot, warm or at room temperature. Serves 6.
Winter Squash Soup with Gruyere Croutons
You might not have enough squash for the entire recipe. Cut ingredients in half or use all butternut instead of both squashes.
Serves 8
Soup 1/4 cup (1/2 stick) butter 1 large onion, finely chopped 4 large garlic cloves, chopped 3 14 1/2-ounce cans low-salt chicken broth 4 cups 1-inch pieces peeled butternut squash (about 1 1/2 pounds)* 4 cups 1-inch pieces peeled acorn squash (about 1 1/2 pounds)* 1 1/4 teaspoons minced fresh thyme 1 1/4 teaspoons minced fresh sage 1 1/2 teaspoons ground cumin 1/2 teaspoon ground ginger 1/8 cup whipping cream
Croutons 2 tablespoons (1/4 stick) butter 24 1/4-inch-thick baguette bread slices 1 cup grated Gruyere cheese 1 teaspoon minced fresh thyme 1 teaspoon minced fresh sage
For soup: Melt butter in large pot over medium heat. Add onion and garlic and sauté until tender, about 10 minutes. Add broth, all squash and herbs; bring to boil. Reduce heat, cover and simmer until squash is very tender, about 20 minutes.
Working in batches, puree soup in blender. Return soup to same pot. Stir in cream and sugar; bring to simmer. Season with salt and pepper. (Can be made 1 day ahead. Chill. Rewarm over medium heat before serving.)
For croutons: Preheat broiler. Butter 1 side of each bread slice. Arrange bread, buttered side up, on baking sheet. Broil until golden, about 1 minute. Turn over. Sprinkle cheese, then thyme and sage over. Sprinkle with salt and pepper. Broil until cheese melts, about 1 minute. Ladle soup into bowls. Top each with croutons and serve.
* If you are not confident in your knife skills or lack a very very sharp one, I’d suggest roasting the squash, halved and seeded, on a baking sheet coated lightly with oil at 425 until soft, scooping it into the pot, and cooking it the rest of the way there. Peeling, seeding and chopping raw squash is not the easiest endeavor. Alternatively, you could buy butternut squash already peeled and chopped in many stores. Haven’t seen acorn yet.
Thank you Denny and Nancy Archey for helping again this evening. They love to pick peppers! The peppers are overflowing this year. I planted quite a lot because previous years have been very lean in producing colored peppers, which are actually ripe peppers. Green peppers are not ripe! This year was a bumper crop, due to the hot weather. Colored peppers contain lycopene , an antioxidant that protects against cancer like blueberries, tomatoes, and other brightly colored vegetables. Enjoy them raw, cut them up and freeze them to use in cooked preparations this winter, make soup (next week’s newsletter), stuff them, fry them, roast them, or make Stewed Peppers from Recipes For Health by Martha Rose Shulman. I have referred you to her column in the New York Times many times. She has published a cookbook, The Very Best Of Recipes for Health: 250 Recipes and More from the Popular Feature on NYTimes.com
Kohlrabi White or red in your share. Can be eaten raw or cooked. Peel before eating. My brother-in-law loves to grill thick slices of kohlrabi! The greens are also edible, raw or lightly sauted.
Beets Not in all shares. If you didn’t get beets, then you got Leaf Beet (see below) Chioggia or Red Ace. Best served roasted: cut off tops and wrap roots in foil. Bake at 400 degrees for 30-60 minutes, depending on the size, until tender. When cool enough to handle, peel skin, slice, and toss with olive oil, balsamic vinegar, salt & pepper. Saute the greens in olive oil and add to the roasted roots for a complete salad.
Shell Beans Tongue of Fire. You are probably tired of shelling beans, and this is the last of them, I promise. Store in the frig in the shell but shell them as soon as possible. (Do it in front of the TV!) Store shelled beans in the frig or cook them and store them in the freezer for use this winter in soups. DON’T EAT THEM RAW! Some fresh beans (cannellini, kidney, broad beans) contain a natural toxin that will make you very sick if not cooked first. To cook the beans for freezing: rinse the beans to remove any debris/dirt from shelling them, put in a heavy pot, cover with water by about 2 inches, add aromatics like garlic, rosemary, thyme, or sage, bring to a boil, reduce heat and simmer for 30-60 minutes, until tender, but not mushy. Add more liquid if necessary during the cooking process. Remove from the heat and add a couple of tablespoons of olive oil, and salt to taste. Let the beans cool. They should be saucy, not dry. Store in the freezer and use in recipes that call for dried beans, but guess what?, you have beans already cooked in the freezer, ready to use! Also see this recipe from Dad Cooks Dinner.
Sweet Peppers Yellow and red block peppers. Also green cubanelles. See above for tips on using sweet peppers. Cubanelles are sweet, but can be a little spicey sometimes. It depends on the particular pepper! Use them raw, stuffed, roasted whole.
Radishes Cherry Belle
Heirloom Tomatoes Brandywine, Goldie, Pruden’s Purple and/or Yellow Brandywine. May be the last, we’ll see if the weather holds out. The heirloom tomatoes actually held up better than the hybrids against the many blights that tomatoes are susceptible to.
Leaf Beet Related to beets and Swiss chard. Can be used like spinach in any recipe. Also called Gator, Perpetual Spinach. Enjoy raw or lightly sauted in olive oil with garlic, salt & pepper.
Collard Greens Only in large shares. Usually tough and long cooking, these collard greens are young and tender. Remove the stems before preparing. See a recipe for Collard Greens and Bacon in the newsletter.
Butternut Squash This year’s winter squash crop is very minimal. I have a terrible problem with squash bugs (stink bugs) that eat the young seedlings and the mature fruit! See the newsletter for recipes for Winter Squash Soup and Butternut Squash Gallette.
Thyme and Sage
Collard Greens with Red Onions and Bacon Gourmet | December 1995
Yield: Serves 8
1/2 pound sliced bacon, cut crosswise into fourths
3 medium red onions, chopped coarse (about 3 cups) 1 1/4 cups chicken broth 1/4 cup cider vinegar 2 tablespoons firmly packed dark brown sugar, or to taste 1/2 teaspoon dried hot red pepper flakes, or to taste 4 pounds collard greens (preferably small leaves), coarse stems and ribs discarded and leaves and thin stems washed well, drained, and chopped coarse
In a deep heavy kettle cook bacon in 2 batches over moderate heat until crisp and transfer to paper towels to drain. Pour off all but about 3 tablespoons drippings and in drippings remaining in kettle cook onions, stirring occasionally, until browned slightly and softened. Transfer onions with a slotted spoon to a bowl.
To kettle add broth, vinegar, brown sugar, red pepper flakes, and about half of bacon, stirring until sugar is dissolved. Add about half of collards, tossing until wilted slightly, and add remaining collards, tossing until combined. Simmer collards, covered, 30 minutes. Stir in onions and simmer, covered, 30 minutes more, or until collards are very tender.
Serve collards topped with remaining bacon.
Butternut Squash and Caramelized Onion Galette
For the pastry: 1 1/4 cups all-purpose flour 1/4 teaspoon salt 8 tablespoons (1 stick) unsalted butter, cut into pieces 1/4 cup sour cream 2 teaspoons fresh lemon juice 1/4 cup ice water
For the filling: 1 small butternut squash (about one pound) 2 tablespoons olive oil 1 to 2 tablespoons butter (if you have only non-stick, the smaller amount will do) 1 large onion, halved and thinly sliced in half-moons 1 teaspoon salt Pinch of sugar 1/4 teaspoon cayenne, or to taste 3/4 cup fontina cheese (about 2 1/2 ounces), grated or cut into small bits 1 1/2 teaspoons chopped fresh sage leaves
1. Make pastry: In a bowl, combine the flour and salt. Place the butter in another bowl. Place both bowls in the freezer for 1 hour. Remove the bowls from the freezer and make a well in the center of the flour. Add the butter to the well and, using a pastry blender, cut it in until the mixture resembles coarse meal. Make another well in the center. In a small bowl, whisk together the sour cream, lemon juice and water and add half of this mixture to the well. With your fingertips, mix in the liquid until large lumps form. Remove the large lumps and repeat with the remaining liquid and flour-butter mixture. Pat the lumps into a ball; do not overwork the dough. Cover with plastic wrap and refrigerate for 1 hour.
2. Prepare squash: Preheat oven to 375 degrees F. Peel squash, then halve and scoop out seeds. Cut into a 1/2-inch dice. Toss pieces with olive oil and a half-teaspoon of the salt and roast on foil lined (for neatness sake) sheet for 30 minutes or until pieces are tender, turning it midway if your oven bakes unevenly. Set aside to cool slightly.
3. Caramelize onions: While squash is roasting, melt butter in a heavy skillet and cook onion over low heat with the remaining half-teaspoon of salt and pinch of sugar, stirring occasionally, until soft and lightly golden brown, about 20 minutes. Stir in cayenne.
4. Raise the oven temperature to 400 degrees. Mix squash, caramelized onions, cheese and herbs together in a bowl.
5. Assemble galette: On a floured work surface, roll the dough out into a 12-inch round. Transfer to an ungreased baking sheet. Spread squash, onions, cheese and herb mixture over the dough, leaving a 1 1/2-inch border. Fold the border over the squash, onion and cheese mixture, pleating the edge to make it fit. The center will be open.
6. Bake until golden brown, 30 to 40 minutes. Remove from the oven, let stand for 5 minutes, then slide the galette onto a serving plate. Cut into wedges and serve hot, warm or at room temperature. Serves 6.
Winter Squash Soup with Gruyere Croutons
You might not have enough squash for the entire recipe. Cut ingredients in half or use all butternut instead of both squashes.
Serves 8
Soup 1/4 cup (1/2 stick) butter 1 large onion, finely chopped 4 large garlic cloves, chopped 3 14 1/2-ounce cans low-salt chicken broth 4 cups 1-inch pieces peeled butternut squash (about 1 1/2 pounds)* 4 cups 1-inch pieces peeled acorn squash (about 1 1/2 pounds)* 1 1/4 teaspoons minced fresh thyme 1 1/4 teaspoons minced fresh sage 1 1/2 teaspoons ground cumin 1/2 teaspoon ground ginger 1/8 cup whipping cream
Croutons 2 tablespoons (1/4 stick) butter 24 1/4-inch-thick baguette bread slices 1 cup grated Gruyere cheese 1 teaspoon minced fresh thyme 1 teaspoon minced fresh sage
For soup: Melt butter in large pot over medium heat. Add onion and garlic and sauté until tender, about 10 minutes. Add broth, all squash and herbs; bring to boil. Reduce heat, cover and simmer until squash is very tender, about 20 minutes.
Working in batches, puree soup in blender. Return soup to same pot. Stir in cream and sugar; bring to simmer. Season with salt and pepper. (Can be made 1 day ahead. Chill. Rewarm over medium heat before serving.)
For croutons: Preheat broiler. Butter 1 side of each bread slice. Arrange bread, buttered side up, on baking sheet. Broil until golden, about 1 minute. Turn over. Sprinkle cheese, then thyme and sage over. Sprinkle with salt and pepper. Broil until cheese melts, about 1 minute. Ladle soup into bowls. Top each with croutons and serve.
* If you are not confident in your knife skills or lack a very very sharp one, I’d suggest roasting the squash, halved and seeded, on a baking sheet coated lightly with oil at 425 until soft, scooping it into the pot, and cooking it the rest of the way there. Peeling, seeding and chopping raw squash is not the easiest endeavor. Alternatively, you could buy butternut squash already peeled and chopped in many stores. Haven’t seen acorn yet.
Thursday, September 23, 2010
White House Gardens Week #15, September 23, 2010
Week #15 September 23, 2010
Your shares this week contain the end of the summer crops and the beginning of the fall crops. The tomatoes, peppers, and eggplant are just about done, and the cool season crops are just beginning to produce. There are 5 weeks left in the farmshare, which is my favorite time of year. It has been very dry, not much rain and the temperatures are still in the 80’s. All the lettuce has been planted, and the spinach is beginning to show signs of life. Less than half of it germinated, but I think we will have a little in a few weeks. I will need to keep the deer away from it by covering with row cover, or there will be nothing for us! Right now they have plenty to eat, but that won’t be the case are a frost. I have enjoyed having some of you to share the harvest with. Thank you to Rob Bowser and Kate Raymond for helping pack the boxes tonight. Rob and Kate shared several ideas with me about how they have been using the vegetables in their share. I encouraged them to send me their ideas so I can share them with you.
Tomatoes Roma or San Marzano tomatoes. Good for making tomato sauce. See a previous newsletter for a recipe for Marinara Sauce. When you cut into these tomatoes, the top portion may not be ripe. This is actually an environmental condition, caused by fluctuations in temperature and moisture. This part can be cut away and the rest of the tomato is usable.
Onions Can be stored in or out of the refrigerator.
Potatoes There are still 5 rows of potatoes to dig, so there will be many more to enjoy. This week’s variety is called All Blue or Russian Blue. It keeps it’s blue color when cooked and stores well. Don’t refrigerate potatoes, as they lose their taste when chilled. These are very small, so enjoy them steamed and tossed with butter and herbs, or cut up and fried.
Shell Beans Cannellini beans in large shares, Tongue of Fire in small shares. To enjoy the beans at their best, shell them as soon as possible. This is best done in front of the TV! Use them just like dried beans in any of your favorite recipes, minus the long soaking. If you can’t cook them right away, the shelled beans can be kept refrigerated for a few days, or freeze them to use later. Don’t store them unrefrigerated as they may not be dry enough and could mold. See last week’s newsletter for recipes. Please do not eat any beans before they are cooked. I learned this the hard way! In the garden I occasionally snack on different varieties to see if they are ready to be picked. I ate some shell beans and that evening and the following day was not feeling very well. Turns out white beans (cannellini), red kidney beans and broad beans (limas) have a natural toxin in them that is only removed by thoroughly cooking them . I found this out through a cooking blog I read regularly, Dad Cooks Dinner, the very next day! So DO NOT EAT THE BEANS RAW!
Peppers Red, sweet peppers called Carmen and yellow Hungarian Hot Wax. Peppers are easy to preserve if you find you have too many of them. Cut into dice or cubes (whatever size you want to use them) and store in the freezer in a zip lock bag. They can be added to fried potatoes, or any dish requiring fresh peppers that are meant to be cooked.
Eggplant Recipe for Baba Ganoush in the newsletter courtesy of shareholder Pat Brannon.
Swiss Chard From the same family as beets, chard can be used in place of any “green” in a recipe. See a previous newsletter for Sauted Chard with cream and prosciutto. The stems and the leaves are edible.
Kale Winterbor is among many varieties of kale. This one has curly leaves.
I love hummus, so when I found eggplant in this week share I thought “baba ganoush” - an eggplant dip similar to hummus. I like this variation which combines these two middle-eastern favorites (CookEatShare.com). Serve with pita or bagel chips. I make my own with day old bagels from Bruegger’s - slice them into rounds and toast lightly in a low oven. Pat Brannon
Eggplant Hummus with Roasted Garlic
1 large eggplant
1/2 cup garbanzo beans
4 garlic cloves skins on
1/4 cup extra virgin first cold pressed olive oil
1/4 cup fresh lemon juice
3 tablespoons of tahini (sesame paste)
1 teaspoon coarse salt
1/4 teaspoon of garlic powder
Garnish with paprika and parsley
Roast both garlic and eggplant in a 425* oven on a baking pan (rub with 2 tablespoons of oil) for 20 minutes.
Remove garlic from pan set aside. Continue to roast eggplant until soft and flat about 25 more minutes. Cool.
Slice eggplant in half and scrape flesh into the bowl of a food processor. Add garbanzo beans. Peel garlic and add to processor bowl, along with juice and tahini, salt and 2 tablespoons oil. Process till smooth.
To serve, drizzle with more oil and paprika on top. Serve with pita chips or bread, celery, carrot sticks or buttery crackers.
The following is a recipe using the kale and beans from your share. Any type of kale can be used along with any type of beans. There is no need to soak the beans before cooking them, as the beans in your share are fresh.
Sauteed Tuscan Kale with Garlicky White Beans
Sunday, September 19, 2010
White House Gardens Week #14, September 16, 2010
Week #14 September 16, 2010
Thanks to helpers Michelle Krocker, Nancy & Denny Archey, and my niece, Sarah Fulton, we got your boxes packed by 8:00 pm again this evening. Thank you, helpers. There is at least one hour less of daylight now, so we have to move fast to get everything picked before the sun goes down. I enjoy growing at this time of year the most, when the days and nights are cooler, the weed pressure is less, and the crops grow slower. Most things that go in your boxes are weighed or counted, so I know how to divide the harvest evenly. When things need to be bunched or bagged, we count out the bags or rubber bands beforehand so there are no mistakes. When things are weighed, such as the arugula, we then divide the weight by the number of shares, AND count out the bags, and then fill them. My math was a little off this evening, so we had to re-bag the arugula to make 35 shares. I know I keep saying this, but this may be the last time there are tomatoes in your share, other than romas and/or heirlooms. Hopefully, we will get some much needed rain this week.
Tongue of Fire Shell Beans Only in large shares this week. There are many more to be picked, so we will have them again, at least for the next couple of weeks. Shell beans are like dried beans, but they don’t need to be soaked before cooking them. The pods can be stored in the refrigerator temporarily , but they should be shelled as soon as possible. If you can’t cook them right away, they can be frozen after they are shelled and cooked when you have more time. A simple way to cook them is to sauté some chopped onions, carrots, celery and garlic in olive oil. Add the shelled beans with enough water to cover and simmer gently for about 30-40 minutes. Add more water if necessary so that the beans don’t go dry. Taste for doneness after about 30 minutes. Here is a link on How to Cook Shell Beans for more information on cooking fresh shell beans. Many of the pods that are in your share are a little drier than I would have liked, but they will still cook quicker than dried beans. Use in place of dried beans in your favorite recipe. Included in the newsletter is a recipe for a shell bean salad. See Recipes for Health for more shell bean recipes.
Radishes French breakfast variety.
Pac Choi This is an Asian vegetable, in the same family as cabbage, broccoli, etc. It can be steamed, sauted, or used in stir fries. Both the stems and the leaves are edible. When stir frying, it’s best to cut the leaves from the thick stem, slice the stems into ½” pieces and add them before the leaves, as the stems take longer to cook. Here is a recipe from shareholder Pat Brannon for a coleslaw made with pac choi.
I tend to improvise in the kitchen---I sliced the bok choy bulb into julienne size pieces. To that I added some chopped Vidalia, and a can of halved Mandarin oranges, a handful of broken walnut meats, and a scattering of Gorgonzola cheese. For the dressing I added a minced garlic clove mashed with a dash of Dijon mustard, than blended in white wine vinegar and olive oil, salt and pepper. The result was a refreshing, crisp fruity slaw. Next time I will try with diced apple and a creamier sweet dressing – maybe with mayo and honey.
Tomatoes The last of the slicing tomatoes. Yellow or red Brandywine, or Goldie, another heirloom
Arugula Has a peppery taste. Use in place of lettuce, or mix with other greens in a salad.
Sweet Peppers Carmen (long, red), red block peppers, and Amish Pimento and/or Topepo. These last two are the short, squat red peppers, very sweet.
Hot Peppers Jalapeno, Serrano, Czech Black, Hungarian Carrot, and Cayenne. The hot peppers are in a paper bag.
Shell Bean Salad With Tomatoes, Celery and Feta
By MARTHA ROSE SHULMAN
This is a perfect end-of-summer farmers' market dish. It makes a nutritious main salad or a great starter or side dish.
For the salad:
1 1/2 pounds shell beans (about 2 1/3 cups shelled)
1 onion, halved
7 cups water
3 large garlic cloves, peeled and crushed
A bouquet garni made with a few sprigs each of parsley and thyme, a sprig of sage and a bay leaf
Salt to taste
1 cup sliced or diced celery
1 pound tomatoes, cut in wedges, the wedges cut in half crosswise, or cut in large dice
1/2 cup crumbled feta (2 ounces)
1/2 cup chopped fresh herbs, such as parsley, basil, chives, tarragon, mint
For the dressing:
3 tablespoons red wine vinegar
1 teaspoon Dijon mustard
Salt and freshly ground pepper to taste
1 garlic clove, minced or pureed
1/3 cup extra virgin olive oil
1. Combine the beans, onion, water, crushed garlic, bouquet garni and salt in a heavy saucepan or soup pot, and bring to a simmer. Cover and simmer 45 minutes, or until the beans are tender. Taste and adjust salt. Remove and discard the onion, the bouquet garni and the garlic cloves. Drain though a strainer or colander set over a bowl.
2. In a large salad bowl, combine the beans, celery, tomatoes, feta and herbs. Sprinkle the tomatoes with sea salt if desired.
3. Mix together the vinegar, mustard, salt, pepper, garlic and olive oil. Toss with the salad, taste and adjust seasonings, and serve.
Variations: You can serve this salad warm or cold. Heat the beans if they've cooled off, then toss with the other ingredients. You can also add some of the liquid from the beans if you want more marinade for the mixture (though the tomatoes will become juicy).
Tuna, Bean and Tomato Salad: Add a drained can of tuna to the mix.
Yield: Serves 6 to 8.
Advance preparation: You can cook the beans up to three days in advance. The salad will hold for a few hours. Tomatoes will continue to release juice, but this just makes everything taste even better.
Saturday, September 18, 2010
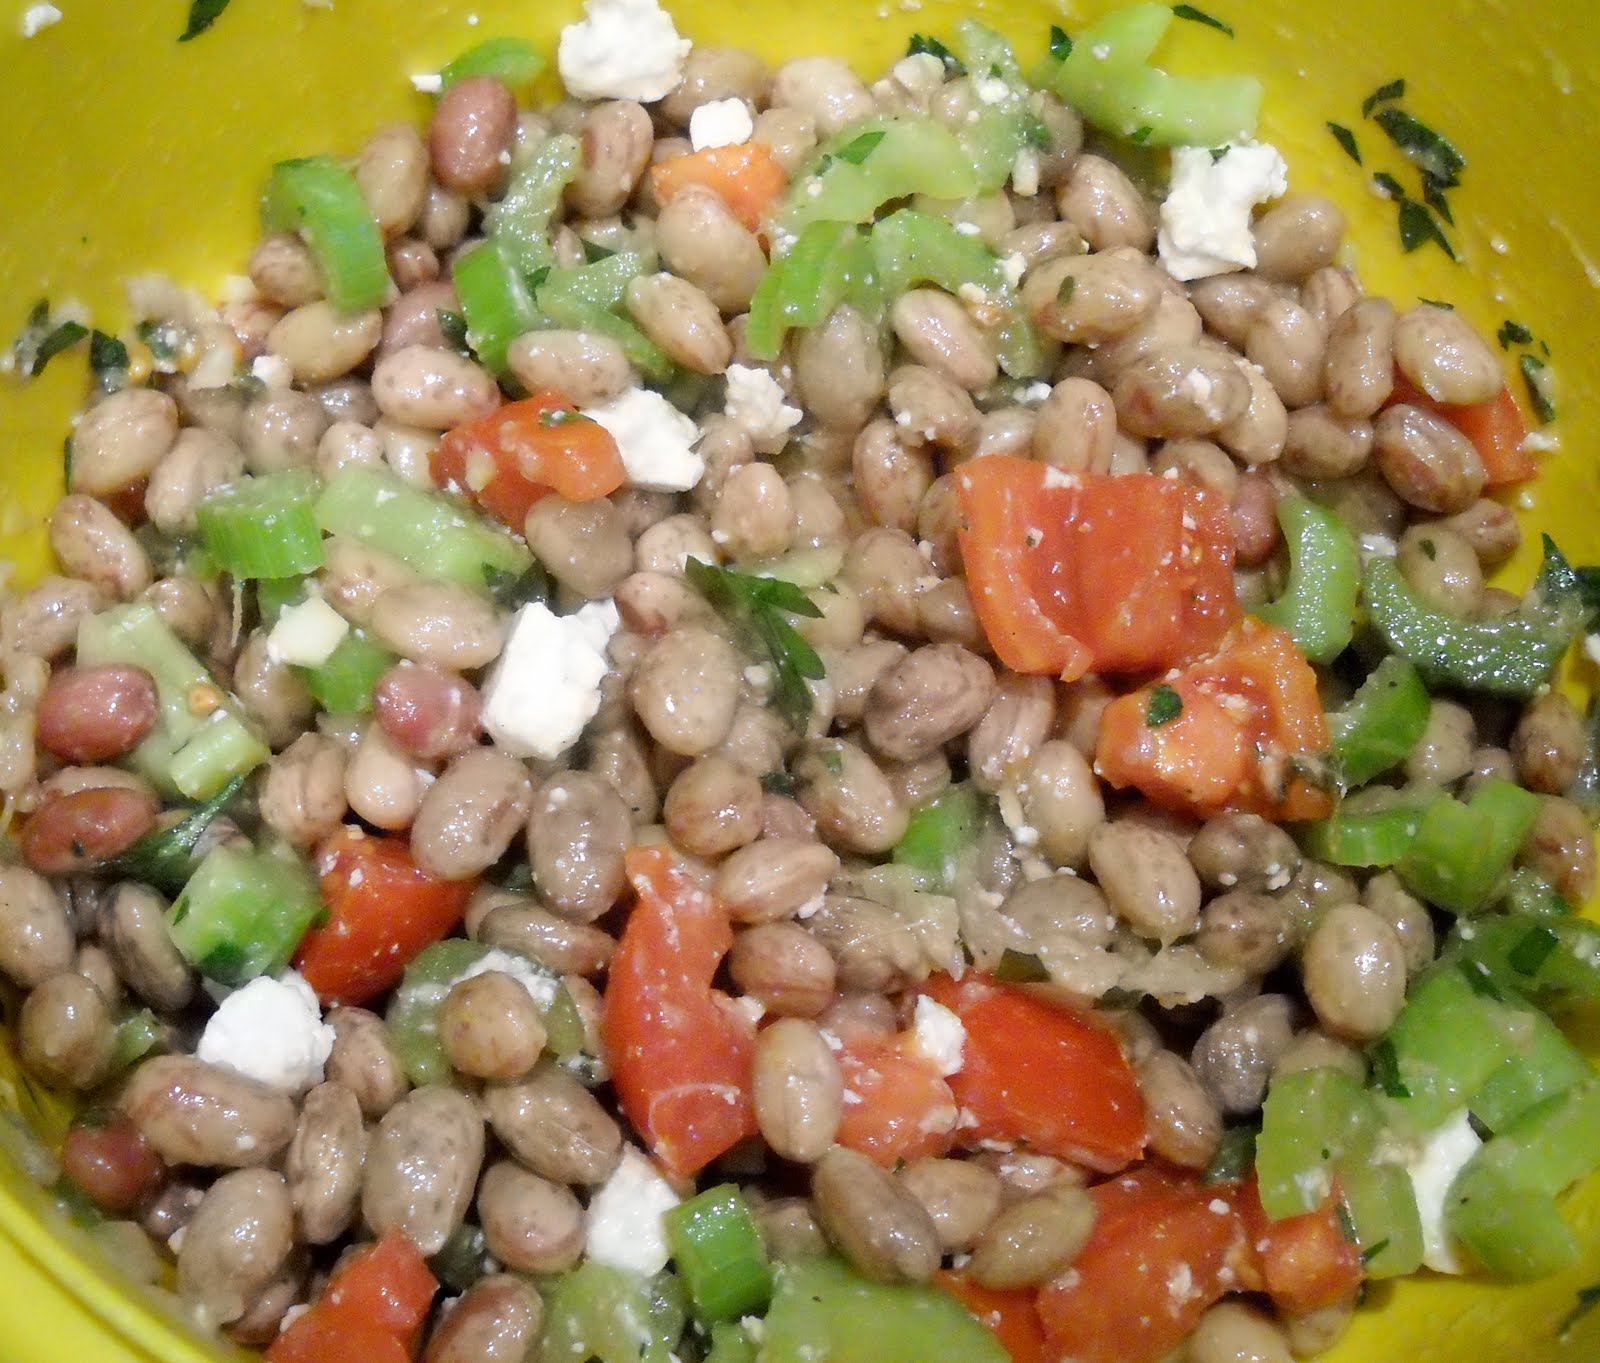
Shell Bean Salad with Tomatoes, Celery and Feta

Here are my freshly shelled beans from this week's box. I made the recipe in the newsletter, Shell Bean Salad with Tomatoes, Celery and Feta.
 | ||
| Beans in the pot with herbs, garlic and onion |
White House Gardens Week #13, September 9, 2010
Once again, we finished packing your boxes early, thanks to helpers Pam & Paul Thielo, Mary Fulton, and Albina Schapel. We even got an extra vegetable in your share: potatoes that were already dug (today), but take extra time to weigh and bag. Thank you, helpers, very much. I thoroughly enjoyed having you help me Thursday evening.
Which brings me to something I have been thinking about this year. Many CSA’s require their members to participate in the planting and harvesting at sometime during the season. When the CSA concept was first established in Japan, shareholders formed a group, sought out a farmer, acquired the land, decided what they wanted to grow, and organized the distribution of the vegetables. That is how the concept was first introduced in this country by Robin Van Eyn. It has evolved since the early eighties into more of a marketing tool where the farmer does most or all of the work.
Next year I am going to offer “working shares”; each shareholder will be required to work a few hours during the season. There will be a schedule for the entire season and everyone will be required to work a shift or two, probably consisting of 3-4 hours per season. Several of you have already volunteered your time, and I am very grateful for your help. Working shares will help to keep the cost down as I won’t have to hire as much outside help. There will be more on this later. I will also be sending out sign up information for next year in a few weeks.
The fall crops are coming along nicely. There is less weed pressure this time of year, and everything looks very fresh and green. The spinach is coming up very slowly. The soil may have been too warm last week for it to germinate. The tomatoes may be at their end, not too many good ones left on the vines. The heirlooms are still looking good, so we will have a few of them for a couple of weeks. I have been disappointed in the paste tomatoes this year. They look like they are ripe, but inside they still look unripe. If anyone has received any that they are unhappy with, please let me know. This variety is one I have never grown before and I have trouble telling when they are ripe.
Tomatoes One quart of hybrids and a couple of red, yellow, or orange heirlooms. Yes, the heirlooms are ugly and much of it needs to be cut away sometimes, but their flavor is usually superior to hybrid tomatoes. But this year, I think all the tomatoes are a little watery and somewhat tasteless.
Sweet Peppers Long, Italian frying peppers called Carmen, yellow Flavorburst, and/or red block peppers. Carmen is very sweet when red, I love this pepper. It produces very well in our short summers. All the peppers are doing very well this year due to the warm weather. Red peppers are fully ripe green peppers.
Eggplant Recipe included in the newsletter
Lettuce Romaine type
Onions Yellow
Carrots
Potatoes Kennebec variety. According to the seed catalog, these are the best for making French fries.
Below is a recipe for stewed tomatoes with eggplant. My sister has made this and it is very good. She made a few changes: doubled the butter, added garlic just as the onions were finishing cooking, and added a splash of white balsamic vinegar at the end. I personally don’t think it’s necessary to purge the eggplant of water with the salt soak when the eggplant you have is so fresh. That step is usually necessary when the eggplant is old and bitter.
Wednesday, September 1, 2010
White House Gardens Week #12, September 2, 2010
Usually, when I begin this newsletter, it is 10:00 pm and we have just finished packing your boxes. Tonight we were done an hour early, mostly due to the fact that shareholder Rob Bowser came again to help. This is his second evening helping to pick and pack, and I am very grateful that he decided to join my niece, Sarah and I. He has been a great help. Thank you, Rob. There was a lot of weighing and bagging tonight which can take a lot of time. He made the bagging of the potatoes a snap by using an algebra equation to figure out how much to weigh for each share. It’s been a long time since I made use of algebra. That brought back a lot of memories of high school algebra class! I guess it really was good for something.
I have been watering the crops nonstop this week. I use drip tape in the rows, and can water about 10 rows at a time. On Sunday, Bradley Cramer and I planted the spinach for the fall. Please say a prayer that it will germinate. Spinach doesn’t like to sprout in hot weather. My method for improving the germination is to soak the seed overnight, then refrigerate it until it just begins to sprout. Then we planted 3, 150’ rows by hand, laid out the drip tape and soaked the rows with cold water. Lastly, we covered the bed with floating row cover, which keeps the wind from drying the soil and provides a small amount of shade. I have been irrigating this bed every other day since Sunday during the hottest week of the year! But it was now or never to get the spinach planted so that we can enjoy it this fall. Because of cooler (ha!) and shorter days, the fall crops can take up to two weeks longer than usual to mature. This year just might be the exception to that rule.
Tomatoes This week it’s tomato palooza! Cherry, slicing, paste, and heirloom tomatoes are in your share. Try roasting them (see Week #11 newsletter), make tomato sauce, stewed tomatoes (can’t find a good recipe, anybody have one?), marinara sauce (recipe included in the newsletter). Also, don’t forget about the Mother Ship Tomato Salad in a previous newsletter.
Lettuce Romaine type, may be a little bitter due to the heat.
Potatoes Yukon Gold. There are still several rows of potatoes to dig. They have been fabulous this year, must have been the rain earlier this summer.
Delicata Squash This is the first of the winter squashes. Shaped like an acorn squash, it can be baked, roasted, or steamed and the skin is edible, unlike butternut squash. The squash bugs severely damaged the crop this year, and I will probably have to buy some squash to supplement the crop from another grower who doesn’t have squash bug problems! Cut the squash in half and bake, cut side down, at 350 degrees with a little water in the bottom until tender, about an hour. Brush with melted butter and sprinkle with brown sugar. Broil until the sugar is carmelized and brown. Or cut into chunks and roast alone or with other vegetables, such as potatoes, carrots, and onions, peppers that are tossed with olive oil, salt and pepper.
Beets Chioggia or candy stripped beets. The best way to cook beets is to bake them, wrapped in foil, at 400 degrees for about an hour depending on their size. I like to eat them warm from the oven with olive oil and balsamic vinegar.
Leef Beet Not in all shares. Also known as Gator, is a member of the beet/chard family. It can be used just like spinach, either fresh or sauted with olive oil and garlic and the stems are edible.
Romano Beans Only in the small shares this week
Marinara Sauce
From Lidia’s Italian American Kitchen by Lidia Bastianich
¼ cup olive oil
8 cloves garlic, peeled
3 pounds ripe fresh plum tomatoes, peeled and seeded or one 35 oz. can peeled Italian plum tomatoes, seeded and lightly crushed, with their liquid.
Salt
Crushed hot red pepper
10 fresh basil leaves, torn into small pieces
Makes about 1 quart, enough to dress 6 servings of pasta
Heat the oil in a 2 to 3 quart nonreactive saucepan over medium heat. Whack the garlic with the flat side of a knife, add it to the oil, and cook until lightly browned, about 2 minutes.
Carefully slide the tomatoes and their liquid into the oil. Bring to a boil and season lightly with salt and crushed red pepper. Lower the heat so the sauce is at a lively simmer and cook, breaking up the tomatoes with a whisk or spoon, until the sauce is chunky and thick, about 20 minutes. Stir in the basil about 5 minutes before the sauce is finished. Taste the sauce and season with salt and red pepper if necessary.
How to Peel Tomatoes:
Bring a large pot of water to a boil and set a bowl of ice water near the stove. Cut the cores out of the tomatoes and cut a small x in the opposite end. Slip a few tomatoes into the boiling water and cook just until the skin loosens, 1 to 2 minutes depending on the tomatoes. (Overcooking will make them soggy.) Fish the tomatoes out of the water with a wire skimmer or slotted spoon and drop them into the ice water. If necessary, let the water return to the boil and repeat with any remaining tomatoes. Slip the skins off the blanched tomatoes and cut the tomatoes in half – lengthwise for plum tomatoes, crosswise for round tomatoes. Gently squeeze out the seeds with your hands.
Thursday, August 26, 2010
White House Gardens Week #11, August 26 2010
Most of the contents of your shares are picked on Monday, Tuesday, and Wednesday evenings. Now that the days are getting shorter, we have almost an hour less of daylight each evening to pick your vegetables. I had two helpers on Wednesday evening, Sarah Fulton, my niece, who works for me part time, and shareholder Rob Bowser. Sarah cut basil in the dark,(among other things) and Rob picked peppers and eggplant and washed them very carefully for you. Thank you to both of them for helping.
The potatoes are dug when time allows and then are stored in my garage until it’s time to put them in your shares. That’s part of the beauty of potatoes; they can sit in the ground and wait to be dug and still be good, even if the tops have died back and it looks like nothing is there but weeds. There are many more rows of potatoes to dig. They should be in your shares regularly until the end of the season. I am continually amazed at what I can produce on such a small area. Each week I think about what I want to pick for your shares and I worry that there won’t be enough for everyone. Then we pick, peppers for instance, and I am overwhelmed at how much is available to put in your shares. I am also amazed at what can be produced from a tiny, little seed. A pepper plant that produces dozens of peppers; a tomato plant that produces scores of tomatoes. What a miracle that is!
Tomatoes This week’s share includes one heirloom tomato, Brandywine, in all shares. These need to be picked before they ripen, or they split and crack. If yours is not ripe, let it sit on the kitchen counter for a couple of days and it will ripen in no time. Other types of tomatoes are cherries, Early Girl, Estiva, Celebrity, St. Pierre, and Pink Beauty, all hybrids. The Pink Beauty have a pink skin and a great flavor. They are one of my favorites. The tomato plants are beginning to decline. In a couple of weeks there will be paste tomatoes, San Marzanos, in your share. Here’s a link to a tomato soup recipe: Blender Tomato Soup
Peppers The peppers are beginning to turn red. If your peppers are just beginning to change color, leave them out of the refrigerator for a few days, and they will continue to ripen. Besides, a bowl of peppers looks just as nice as a bowl of fruit on the table! Green peppers are unripe peppers. You may have Carmen, a long, thin green to red pepper; Flavorburst, light green ripening to yellow; Ace and/or Revolution, a green to red bell pepper. Also in your shares are Hungarian Hot Wax, the long, thin yellow ones. These are mildly spicey. Any pepper can be stuffed and baked.
Eggplant I grow 4 kinds of eggplant. Violetta: long and thin. Prosperosa: dark purple, globe shaped. Rosa Bianca: light purple. Galine: traditional. All of these varieties are interchangeable in recipes calling for eggplant. See Week #9 newsletter for a link to eggplant recipes. Included in the newsletter is a recipe for grilled eggplant. Or here’s a link: Grilled Eggplant
Potatoes Dark Red Norland.
Romano Beans Not in all shares. These are flat pods with great flavor. Next week there should be more. I keep track of who gets what each week if there isn’t enough to go around and make sure that those who didn’t get something get it the next time.
Swiss Chard Chard and beets come from the same plant family. Chard can be used like spinach; it can be eaten raw or cooked. The stems are also edible. Included in the newsletter is a recipe.
Onions Most shares received several large yellow onions called Alisa Craig. These grow very large, but do not keep long. It’s best to store them in the refrigerator.
Parsley and Basil Store parsley in the refrigerator, but not the basil. Store basil like cut flowers with a loose bag over the top. Trim the stems periodically and change the water to keep the basil fresh. Make a basil puree in the food processor with enough olive oil just to make a paste. Freeze in ice cube trays. When frozen, store in plastic bags in the freezer. Use a cube or two when making soup or tomato sauce.
Easy Oven-Roasted Tomato Sauce From TheBittenWord.com
Ingredients:
1 pound fresh tomatoes 1/2 cup thinly sliced onions 2 cloves smashed garlic 5 thyme sprigs Olive oil to drizzle Salt and Pepper to taste
Preheat oven 350 degrees. Halve small tomatoes. Quarter large tomatoes. Arrange the tomatoes on a baking sheet in a single layer. Scatter sliced onions over the pan. Nestle the thyme springs among the tomatoes. Drizzle with olive oil. Season with salt and pepper. Roast for 1 to 1 1/2 hours, depending on how cooked you would like your tomatoes.
Remove pan from oven. Discard thyme sprigs. Allow tomatoes to cool slightly. Using a blender, food processor or food mill, blend the tomatoes until they liquified (as chunky or as smooth as you would prefer).
If using sauce immediately, enjoy! If freezing, allow the sauce to cool, transfer to freezer bags and freeze.
Spicy Hoisin Glazed Eggplant Serves 4
1 tablespoon canola oil
1-inch piece fresh ginger, grated
2 cloves garlic, finely chopped
1 teaspoon red chile flakes
1/2 cup hoisin sauce
1 tablespoon rice wine vinegar
1 tablespoon low sodium soy sauce
2 medium eggplants, ends trimmed and cut into ½-inch thick slices
6 tablespoons olive oil
Salt and freshly ground black pepper
2 green onions, white and green part, thinly sliced
1. Heat the oil in a small saucepan over medium heat. Add the ginger, garlic and red chile flakes and cook until soft, 3 to 4 minutes. Remove from the heat and whisk in the hoisin, vinegar and soy sauce until combined. 2. Heat your grill to high. 3. Brush eggplant slices on both sides with the oil and season with salt and pepper. Place the slices on the grill and grill until golden brown and slightly charred, 4 to 5 minutes. Brush with some of the glaze, turn over and continue grilling just until cooked through, brushing with more of the glaze, 3 to 4 minutes longer. Remove from the grill and brush with the remaining glaze. Transfer to a platter and sprinkle with the green onion.
Creamed Swiss Chard With Prosciutto
This recipe is one of my sister’s favorites. You can use prosciutto, pancetta, or bacon. They all work great.
2 T. olive oil
¼ cup diced prosciutto
¼ cup minced yellow onion
1 T. minced garlic
8 cups chopped Swiss chard leaves (you can use the stems also, separate them from the leaves and cook the stems first, then add the leaves)
1/3 heavy cream
Salt and pepper as needed
¼ cup grated Parmesan cheese
¼ t. grated nutmeg
Heat olive oil in a large sauté pan over medium heat. Add the prosciutto and sauté until aromatic, about 1 minute. Increase the heat to high and add the onion and garlic. Saute, stirring constantly, until the garlic is aromatic, about 1 minute more.
Add the Swiss chard, sautéing just until the leaves wilt, about five minutes. Add the heavy cream and bring to a simmer. Cook the Swiss chard until it is tender, about 5 minutes.
Season generously with salt and pepper. Remove from heat and stir in the Parmesan and nutmeg. Serve immediately ina heated bowl or on heated plates.
Thursday, August 19, 2010
White House Gardens Week #10, August 19, 2010
Week #10 August 19, 2010
This has been a very challenging week for me in the garden. There is so much more to plant for you, but I seem to be running out of time! That’s my biggest challenge, finding the time to do all that I want to do. There are so many new things that I want to try and grow. When these things overwhelm me, I feel like I’m running in circles, and not accomplishing anything. The days are definitely getting shorter and I can feel the coolness in the air now that the humidity has left. Fall is upon us and summer is winding down.
The tomatoes are peaking, especially the cherry tomatoes, but the heirlooms are not ripening yet. Hopefully the nice weather will continue so we can enjoy the many colors and flavors of the heirloom tomatoes. The lettuce in your share is an iceberg lettuce. I am not happy with it’s appearance, I think I let it grow a little too long before picking. Please let me know what you think of the taste. Iceberg lettuce is a challenge to grow in my soil, too much clay. There will be a couple of weeks without lettuce, until the next planting is ready. In all, I have been pleased with the fact that I have put lettuce in your shares more times than not. That was one of my goals for this year.
Another goal was to grow more and better melons. I definitely got more, but I felt most of them did not taste very good. I would love to hear your comments on the melons, especially the muskmelons or cantelopes.
I am also not pleased with the fennel that I picked this week. I have tried to grow fennel for several years and I think this year may be the last. Many of the bulbs had bolted without even becoming a bulb! There is some information about fennel and a couple of recipes in the newsletter. My favorite way to cook fennel is to sauté it in olive oil and garlic. Trim the stalks from the bulb and slice crossways into ¼” slices. Heat olive oil over medium heat, add garlic and crushed red pepper to taste and sauté for 30 seconds. Add the fennel slices and cook over medium heat until lightly browned and tender. This makes a great side dish.
All the peppers this week are hot and/or mildly spicey. Large shares include some Cubanelles, which are only slightly hot. The others are jalapenos, Serrano (thin green and/or red), Cayenne (small red, shriveled), Czech Black (dark purple), or Bulgarian Carrot (yellow). Small shares do not include Cubanelles. There will be more later.
Tomatoes Cherry and slicing tomatoes. Included in the newsletter is a recipe for Jamie Oliver’s “The Mothership Tomato Salad”. I love this recipe because it’s so simple and can be used to make a salad, a topping for bruschetta, or tossed with pasta.
Lettuce Iceberg type.
Carrots Carrots (and many other vegetables) are great roasted. Cut them into slices or chunks along with any other vegetables you may have, such as onions, peppers, potatoes, tomatoes, garlic. Cut all the vegetables into same size pieces so they cook evenly. Toss with olive oil, salt & pepper. Bake at 400 degrees until tender. The time will depend on what vegetables you are using.
Fennel See above on how to sauté fennel. Also see info and more recipes in this newsletter
Watermelon The dark green ones have red flesh, and the light green ones with dark stripes have yellow flesh
Red Onions
Green Beans Romano (Italian flat green beans) or Tongue of Fire. The later can be eaten as a fresh bean or picked later as a fresh shell bean. Tongue of Fire is green with red streaks.
Peppers This week’s share is all about hot peppers. Try the Cubanelles stuffed with meat or cheese and baked. Use the jalapeno, Serrano, Bulgarian Carrot, Cayenne, or Czech Black to make salsa or add them to fried potatoes.
The Mothership Tomato Salad
From “Jamie at Home” by Jamie Oliver
2 ¼ pounds mixed ripe tomatoes, different shapes and colors
Sea salt and freshly ground black pepper
A good pinch of dried oregano
Red wine or balsamic vinegar
Extra virgin olive oil
1 clove garlic, peeled and grated
1 fresh red chili, deseeded and chopped
Depending on the size of your tomatoes, slice some in half, some into quarters and others into uneven chunks. Straightaway this will give you the beginnings of a tomato salad that’s really brave and exciting to look at and eat. Put the tomatoes into a colander and season with a good pinch of sea salt. Give them a toss, season again and give a couple more tosses. The salt won’t be drawn into the tomatoes; instead it will draw any excess moisture out, concentrating all the lovely flavors. Leave the tomatoes in the colander on top of a bowl to stand for around 15 minutes, then discard any juice that has come out of them.
Transfer the tomatoes to a large bowl and sprinkle over the oregano. Make a dressing using one part vinegar to three parts oil, the garlic and the chili. Drizzle the tomatoes with enough dressing to coat everything nicely.
This is a fantastic tomato salad, which is totally delicious to eat on its own. It’s also great served with some balls of mozzarella or some nice, grilled ciabatta bread.
Note: This can also be tossed with hot pasta. Crush the tomatoes with your hands, then toss with pasta, add fresh mozzarella and basil.
Fennel From a distance, fennel plants growing in the
field look like a tall, rich, plush carpet. With a sweet, delicate anise flavor,
fennel can be used much like celery in soups, salads, stir-fries, and
other dishes. When used raw, its distinct taste shines through. When
cooked, it imparts a subtle but delicious quality to the finished dish.
STORAGE
Cut off the stalks where they emerge from the bulb. To use the feathery
foliage as an herb, place the dry stalks upright in a glass
filled with two inches of water, cover the glass loosely
with a plastic bag, and store in the refrigerator
for up to five days. The unwashed bulb will
keep in a plastic bag in the refrigerator for at
least a week.
Fennel and Potato Gratin
This is a tasty variation of a traditional
dish. Replace the half-and-half with
whole milk for a less rich dish. Friend
of the Farm.
Serves 4 to 6
butter for greasing the baking dish
1 medium fennel bulb, cut crosswise into
1/8-inch slices (about 2 cups)
2 cups thinly sliced Yukon gold potatoes
(about 2 large potatoes)
salt
freshly ground black pepper
2 cups half-and-half
2 tablespoons butter
1. Preheat the oven to 350° F. Lightly coat a shallow 2-quart
baking dish with butter.
2. Cover the bottom of the baking dish with a layer of fennel slices.
Cover with half of the potato slices. Sprinkle with salt and pepper to
taste. Repeat layers until you’ve used up all your slices.
3. Bring the half-and-half to a gentle boil in a medium pan over medium-
high heat. Pour it over the fennel and potato.
4. Using a large spatula, press down on the top layer to submerge it.
Dot with butter. Bake until potatoes are tender and the top is golden,
about 1 hour.
HANDLING
Remove any damaged spots or layers. Cut the bulb in half lengthwise
and check the inner core. If it’s tough, remove it with a paring knife.
Fennel should be washed carefully, because dirt can lodge between
the layers of the bulb. Chop or mince the leaves.
Rich Summer Fennel Soup
This hearty soup makes for a meal on its own, and it’s even better the
next day for lunch, though the farm crew seldom leaves any behind.
To make your tomatoes virtually peel themselves, score a very
shallow X on the bottom of each one, put them in a heatproof
bowl or measuring cup, and pour boiling water
over them. Leave them in the boiling water for a
minute or so if necessary; the peel will loosen completely.
Angelic Organics Kitchen.
Serves 3
Bouquet Garni:
1 sprig parsley, stem only
1 bay leaf
1 sprig thyme
Soup:
2 tablespoons unsalted butter
2 tablespoons vegetable oil
1 medium onion, sliced
1 to 2 cloves garlic, crushed
1 medium or large fennel bulb, roughly chopped
1 large carrot, chopped
1 medium potato, peeled, cubed
2 medium tomatoes, peeled, seeded, chopped
3 cups vegetable or chicken stock
2 tablespoons Pernod (licorice-flavored liqueur) (optional)
1/4 cup heavy cream or silken tofu
salt
white pepper
chopped parsley
1. To prepare the bouquet garni, tie together the parsley stem, bay
leaf, and thyme sprig in a piece of cheesecloth.
2. Heat the butter and oil in a large saucepan over medium heat. Add
the onion; sauté for 1 minute. Add the garlic and sauté for 1 minute more.
3. Stir in the fennel, carrot, and potato and cook for 5 minutes. Add
the tomatoes, stock, and bouquet garni. Bring to a boil, then reduce
the heat to a simmer. Cover and cook over low heat until the fennel
is very soft, about 30 minutes.
4. Discard the bouquet garni. Let the mixture cool slightly and then
purée it in batches in a food processor or blender. (If you are using tofu
instead of cream, add it now and purée with the rest of the ingredients.)
5. Return the soup to the pot and stir in the Pernod and cream. Heat over
medium-low heat to allow the soup to heat through, but do not boil. Season
with salt and white pepper to taste. Garnish with parsley.
Excerpted from Farmer John’s Cookbook: The Real Dirt On Vegetables: Seasonal Recipes and Stories from a Community Supported Farm
by Farmer John Peterson & Angelic Organics (Gibbs Smith Publisher). Check with your local farm or bookstore for availability.
Thursday, August 12, 2010
White House Gardens Week #9, August 12, 2010
Almost half way through the season, it’s hard to believe. Somewhere in early July I lose track of time, and then all of a sudden, it’s August. Where did the time go?
I love the summer vegetables, but my favorites are the ones that grow in cooler weather: broccoli, cauliflower, cabbage, Brussels sprouts, carrots, spinach. That’s what I have been busy planting for you, the fall vegetables.
This week’s share is just the beginning of the summer vegetables. The tomatoes are beginning to ripen faster, the peppers are getting huge, and the eggplant is just beginning to produce. The first planting of green beans are being pulled up to make room for kale and spinach, and the second planting of beans will be ready to pick any minute! The melons are winding down, and the winter squash is creeping out of it’s row into the cauliflower. I planted 12 varieties of potatoes, 1800 row feet in all. That’s a lot of potatoes to dig! I have dug one row and we harvested about 150 pounds. Hard work when you’re doing it with a potato fork and two people! I put a call in to a friend that has a piece of equipment I sold to him several years ago that might make the potato digging go a little faster. I hope it works!
The heirloom tomatoes are beginning to ripen, however, the entire tomato crop is plagued by septoria leaf spot, a disease that affects the leaves, not the fruit. This disease causes the leaves to turn brown and eventually fall off. The fruit is affected by sun scald because there is no foliage to cover the ripening tomatoes. I hope the plants can hold out another couple of weeks, but it seems to be spreading rather rapidly. We’ll see what happens. We had a lot of rain earlier in the season, which can contribute to tomato diseases. I don’t use any fungicides that aren’t approved for organic use, and I only used a copper fungicide one time this year.
All of the onions have been harvested and are drying in the greenhouse with huge fans blowing are over them. The summer squash and zucchini plants are done, although I did plant another row a week ago. Nothing has come up yet. Hopefully we will have a warm, dry fall and the plants will have a chance to produce some more zucchini.
Lettuce This week’s lettuce is a red romaine and/or a butterhead called Nancy. Next week look for iceberg lettuce!
Potatoes This week’s variety is Dark Red Norland. Don’t wash your potatoes until you are ready to use them. Store in the bag they came in, out of direct light. Light causes the potatoes to take on a green cast, which is actually harmful if eaten in large quantities. If any of your potatoes are green in some areas, cut or peel this green off, don’t eat it!
Peppers The peppers are just beginning to ripen. Green peppers are actually non-ripe red peppers. Some of you may have received some ripe, red peppers. There will be more to come! The long, reddish pepper (if you got one) is called Carmen. It is red when fully ripe and very sweet. If your peppers are just beginning to redden, let them stay at room temperature for a few days and they will continue to ripen. The pale yellow one is called Flavorburst and turns bright yellow when ripe. Next week look for mildly hot, or hot peppers.
Eggplant I grow 4 varieties of eggplant: Violetta (long and skinny shape), Prosperosa (globe shaped with a tinge of purple), Rosa Bianca (globe shaped, light purple), and Galine, a traditional eggplant. The taste is the same, just the color and shape are different. Here is a link to Recipes for Health from the New York Times with many suggestions for preparing eggplant. My favorite way to prepare eggplant: Cut the eggplant into ¼” slices. Bread with flour, then beaten egg, then seasoned bread crumbs and fry until golden brown. I love eating this hot or cold.
Green Beans This is the last of Provider. Next will be Italian Romano beans and/or Tongue of Fire, a flat green bean with mottled/reddish hues. Tongue of Fire can be picked for fresh use or left on the plant to produce fresh shell beans, both of which we will enjoy.
Melons This week’s share includes muskmelons and watermelon. If your watermelon is a light green color with dark stripes then it has yellow flesh. If it is dark green, then it has red flesh. It is very difficult to tell when watermelons are ripe. Thumping is one technique. If the watermelon produces a deep, hollow sound when thumped, then it is probably ripe! Watermelons do not continue to ripen after being picked, so it’s pretty much a guessing game. Please let me know if yours is NOT ripe.
Tomatoes Hybrid tomatoes Early Girl, St. Pierre, Celebrity and/or Estiva. Cherry tomatoes are Sun Gold, Black Cherry, Sweet Chelsea or Sun Cherry. A very few of you got some heirloom tomatoes. These are the misshapen, sometimes cracked, ugly globes! They sure don’t win any beauty contests, but their flavor is superb.
Eggplant and Tomato Gratin
By MARTHA ROSE SHULMAN
This is a delicious, low-fat version of eggplant Parmesan. Instead of breaded, fried eggplant, though, the eggplant in this dish is roasted and sliced, layered with a rich tomato sauce and freshly grated Parmesan, and baked in a hot oven until bubbly.
For the tomato sauce:
1 tablespoon extra virgin olive oil
1 small or 1/2 medium onion, chopped
2 to 4 garlic cloves (to taste)
2 pounds fresh tomatoes, quartered if you have a food mill or else peeled, seeded and chopped; or 1 1/2 (28-ounce) cans chopped tomatoes, with juice
Salt and freshly ground pepper
1/8 teaspoon sugar
2 sprigs fresh basil
For the gratin:
2 pounds eggplant, roasted
Salt and freshly ground pepper
2 tablespoons slivered fresh basil leaves
2/3 cup freshly grated Parmesan
1/4 cup bread crumbs
1 tablespoon extra virgin olive oil
1. Roast the eggplant. Roast, cut in half lengthwise, cut sides down at 450, about 30 minutes
2. Meanwhile, to make the tomato sauce, heat the olive oil in a large, heavy, preferably nonstick skillet over medium heat, and add the onion. Stir until tender, about five to eight minutes, then add the garlic. Stir until fragrant, about a minute, and add the tomatoes, salt (1/2 to 1 teaspoon), pepper, sugar and basil sprigs. Turn the heat up to medium-high. When the tomatoes are bubbling, stir well and then turn the heat back to medium. Stir often, until the tomatoes have cooked down and are beginning to stick to the pan, about 25 minutes. Remove the basil sprigs.
3. If you did not peel the tomatoes, put the sauce through the fine blade of a food mill. If the tomatoes were peeled, pulse the sauce in a food processor fitted with the steel blade until coarsely pureed. Taste and adjust seasoning.
4. Preheat the oven to 400 degrees. Set aside 1/4 cup of the Parmesan and mix with the bread crumbs. Oil the inside of a two-quart gratin or baking dish with olive oil. Spread 1/2 cup tomato sauce over the bottom of the dish. Slice the roasted eggplant about 1/4 inch thick, and set an even layer of slices over the tomato sauce. Season with salt and pepper. Spoon a layer of sauce over the eggplant, and sprinkle with basil and Parmesan. Repeat the layers one or two more times, depending on the shape of your dish and the size of your eggplant slices, ending with a layer of sauce topped with the Parmesan and bread crumb mixture you set aside. Drizzle one tablespoon of olive oil over the top. Place in the oven and bake for 30 to 35 minutes, until bubbling and browned on the top and edges. Remove from the heat and allow to sit for at least 10 minutes before serving. Serve hot, warm or room temperature.
Yield: Serves six
Advance preparation: The tomato sauce can be made up to three days ahead. The casserole can be assembled a day ahead, covered and refrigerated, then baked when you wish to serve it. Don’t add the last layer of bread crumbs and Parmesan, with the drizzle of olive oil, until right before you bake it.
Wednesday, August 4, 2010
White House Gardens Week #8, August 5, 2010
Week #8 August 5, 2010
It’s hard to believe that August has begun, and we are barely half way through the 20 week season. I have been busy planting the fall crops: broccoli, cauliflower, cabbage, kale, carrots, and many others. All of these vegetables actually like cooler temperatures, and they taste better when the weather is cooler too.
The tomatoes are beginning to pick up speed. Everyone received a few, most of you also got cherry tomatoes.
The melons are ripening in a big hurry: everyone received at least one. I planted several varieties, each one becoming mature at different times. But I guess the melon seeds didn’t read the seed packet, because they all want to be picked right now! I guess it’s true that you should be careful what you wish for. My wish was to be able to grow good tasting melons. I got my wish regarding quantity, let me know how they taste. Next week the watermelons should be ready.
Tomatoes Slicing variety: either New Girl, Estiva, St. Pierre, or Pink Beauty.
Cherry Tomatoes Large boxes only. Sun Gold, Black Beauty, Sweet Chelsea, and/or Sun Cherry.
Green Beans This is the third picking of Provider, and they are still going strong.
Peas Shelling peas in large boxes only. This is the last of them. Please shell these as soon as possible and store in the refrigerator.
Lettuce Green Ice (green, crinkly leaves) and/or Antares (red, oak leaf)
Melons Orange muskmelon named Halona or Athena, although some of you may have a green type, also. If the rind still feels hard, leave the melon on the counter for a day or two to ripen further. If your melon feels soft, then consume immediately!
Peppers The peppers are just beginning to get big. These first ones are Hungarian Banana Peppers which are a little spicey! (HOT). In the future I will be putting all hot peppers in a bag in your box, to distinguish between sweet and hot.
Onions All the onions have been removed from the field and are drying in the greenhouse. This is the first batch of cured onions. These do not need to be stored in the refrigerator.
Basil Store basil like cut flowers. Trim the stem, remove lower leaves, and store in a vase of water. Cover the top with a plastic bag Don’t store basil in the refrigerator, it will turn black from the cold.
The following recipe for green beans is from a blog I read, Dad Cooks Dinner You can use this technique for just about any vegetable.
Recipe: Steam-Sauteed Green Beans
Equipment:
Wide saucepan or fry pan with a lid
Ingredients:
1 pound green beans, stem ends trimmed
2 cloves garlic, minced
1/2 cup water
1/2 tsp kosher salt
1/2 tsp ground pepper
1 tbsp butter (optional, but pretty plain without it)
1 lemon, zested then halved (optional)
Trimmed beans
1. Steam the Green Beans: Put the beans in the pan. Add the garlic, 1/2 cup water, 1/2 tsp kosher salt, 1/2 tsp ground pepper, and 1 tbsp butter. Cover the pan, and put over medium-high heat. Wait for the water to come to a boil, then cook, covered, for 8 minutes
2. Saute the Green Beans: Remove the lid, and cook, stirring the beans occasionally. Keep cooking until all the remaining water boils off and the beans are tender, and just starting to brown, another 2-3 minutes. *You should be left with just the butter in the pan, and you'll know you're there when you hear the beans start to sizzle. I test for doneness by biting into a bean; it should have just a hint of crunch to it.
3. Season the beans: Squeeze the lemon over the beans and stir to combine. Pour the beans, butter and lemon juice onto a serving platter. Sprinkle with the lemon zest and serve. Variations: *I'm in a real hurry: Skip the garlic and lemon - just use beans, salt, pepper and butter. *I want to be really healthy: Cut the butter back to 1 teaspoon. I wouldn't eliminate it entirely. Even a little butter adds a big hit of flavor to the beans. *Olive Oil: Substitute olive oil (or any other vegetable oil) for the butter, or do half butter, half oil. *Asian: Add 2 cloves of minced garlic with the green beans, substitute 1/4 cup soy sauce for half the water, and substitute 2 tsp vegetable oil and 1 tsp toasted sesame oil for the butter. *Orange beans: Substitute half an orange and its zest for the lemon.
Notes: *Trimming green beans: I grab a handful, line them all up with the stem side facing in the same direction, then push the bunch of beans up against my knife to get the stems in a line. This makes it easy for me to chop the stems off a lot of beans in one slice.
Thursday, July 29, 2010
This has been another amazing week in the garden. A total of two inches of rain fell on Friday and Saturday. Then tonight we had another downpour. I haven’t checked the rain gauge yet, but it should be close to another inch. I had trouble deciding what to put in your boxes, there’s so much ready to be picked!
The tomatoes are beginning to pick up speed. Everybody got either cherry tomatoes or small, slicing ones. The heirlooms will take a bit longer to ripen, they should be ready in a few weeks.
The green beans are loving all the rain. They should be in your shares for the next couple of weeks. The next planting of beans has not done well, so there will probably be a gap in between.
Everyone received a muskmelon in their share. This one has orange flesh and has pretty good flavor. Leave it on the counter for a day or two, and it will ripen further. These are the best melons I have ever grown, as far as quantity and appearance. The taste can vary so much between fruits, I hope yours tastes good. If not, please let me know, so I can decide whether to grow this particular variety again. They are a hybrid call Halona. I grow all the melons on a 30’ x 150’ piece of landscape fabric. The transplants are planted through holes in the fabric. They are covered with row cover until they bloom, to exclude insects, such as the cucumber beetle and squash bug. The row cover must be removed when they bloom so that bees can pollinate them. Usually my melon plants succumb to disease before the fruits reach full maturity, but so far this year, they are loaded with fruit, and only now are showing signs of deteriorating. Here’s hoping they will be able to hang in there so that the fruit can ripen. I grew 8 varieties this year, along with 4 varieties of watermelon.
Tomatoes Everybody got either cherry tomatoes, or small slicing tomatoes. I grow 4 kinds of cherries: sun gold (orange), black cherry (dark purple), sun cherry, and sweet Chelsea cherry (both red). The slicing tomatoes are either Early Girl or Estiva, both hybrids, and very reliable.
Green Beans Provider is the variety I grow for the main crop of beans.
Beets Red Ace is the variety I grow. See Recipes for Health at New York Times for more recipes.
Savoy Cabbage This cabbage has finer texture than red or green cabbage, with crinkly leaves. Use like regular cabbage in coleslaw or sauted, as in Hungarian Cabbage & Noodles. See Week #3 for a recipe. Or try this very simple coleslaw recipe:
Cole Slaw
10 cup cabbage, sliced thin, tossed with salt
½ t. salt – let cabbage drain tossed with salt for a couple of hours
Dressing
1 cup cream
1/3 cup sugar
1/3 cup vinegar – white or apple cider
Lettuce This week’s share includes either Slobolt (green, ruffly leaves) or Antares (red, oak leaf). Remember that summer lettuce can be a little bitter. Shareholder Susan Connelly shared a tip from the Food Network: Wash the lettuce very well, store in a plastic bag, with lots of air in it in the frig for a couple of days. Supposedly, this removes the bitterness.
Cucumbers This summer I can’t seem to get enough of Cucumber Salad. I have been making it weekly since I began picking cucumbers. This will be the last of the cucumbers. I pulled up the plants this past weekend; they were declining rapidly. See Week #3 for a recipe for Cucumber Salad.
Carrots This variety is Napoli, the mainstay of carrots!
Thursday, July 22, 2010
White House Gardens Week #6, July 22, 2010
We finally got some measurable rain tonight. It interrupted the picking twice! Boy, it was great to have some rain. I’m not sure how much, but we sure did get muddy!
Every time I plan for what to pick for your shares each week, I worry that there won’t be enough, or that the quality won’t be good, or there won’t be enough variety. Then I start picking, and I’m surprised at what is ready and how much. All my careful planning goes out the window when the weather doesn’t cooperate.
While checking the bean plants this week, I was amazed that there were beans on the plants, about 3” long. Look for green beans in your share next week. The tomatoes are slowly ripening. Several of you got a pint of cherry tomatoes or some Early Girl tomatoes. With this rain, they will begin to ripen faster.
Some of you got pickling cucumbers and the rest got shelling peas. There will be more peas hopefully. They are late this year because the first planting failed (not enough rain). I replanted knowing that the hot weather might compromise the plants, but they seem to be doing fine. There are blossoms and small pods all over the plants. The hot weather doesn’t seem to be bothering them too much.
Romaine Lettuce I have been more successful this year putting lettuce in your boxes more often. We may skip a week or two, but the next planting looks very promising. Lettuce grown in hot weather can be a little bitter.
Onions These are fresh, store in the refrigerator, and the green tops can be used like green onions.
Cucumbers This will probably be the last of the cucumbers for awhile. The plants are beginning to deteriorate and succumb to disease. I will be planting some in the greenhouse this weekend in the raised boxes that grew the first potatoes. This is a new experiment, I hope it works out. Several of you received pickling cucumbers. These are the short, fat ones, with a little bit of white at one end. See last week’s newsletter for a recipe for refrigerator pickles.
Zucchini The zucchini plants are also winding down. There should still be some for the next 2 weeks.
Kale This variety is called Red Russian. See Week #2 for a recipe for sauted kale or kale chips.
Peas These are a shelling variety. Shelling peas is not hard, but can take some time. Snap off the top, pull down to remove the string, then split open the pod. Fresh peas are my favorite snack when I’m working in the garden.
Kale with Garlic and Bacon
(This recipe serves 8, and calls for more kale than is in your share, so adjust amounts accordingly.)
Shredding the kale allows you to cook it for a shorter period of time, so it retains an appealingly bright color and is gentler in flavor than if it had been slow-cooked.
Yield: Makes 8 servings Active Time: 50 min Total Time: 1 hr
2 1/2 pounds kale (about 4 bunches), tough stems and center ribs cut off and discarded 10 bacon slices (1/2 pounds), cut into 1/2-inch pieces 4 garlic cloves, finely chopped 2 cups water
Stack a few kale leaves and roll lengthwise into a cigar shape. Cut crosswise into 1/4-inch-wide strips with a sharp knife. Repeat with remaining leaves.
Cook bacon in a wide 6- to 8-quart heavy pot over moderate heat, stirring occasionally, until crisp, then transfer with a slotted spoon to paper towels to drain. Pour off and discard all but 3 tablespoons fat from pot, then cook garlic in remaining fat over moderately low heat, stirring, until pale golden, about 30 seconds. Add kale (pot will be full) and cook, turning with tongs, until wilted and bright green, about 1 minute. Add water and simmer, partially covered, until just tender, 6 to 10 minutes. Toss with bacon and salt and pepper to taste.
Pappardelle With Greens and Ricotta
By MARTHA ROSE SHULMAN
1 pound greens, such as chard, kale or broccoli rabe, stemmed and washed well, or half of a 1-pound bag prepared greens
Salt
2 tablespoons extra virgin olive oil
1 to 2 garlic cloves, to taste, minced
3/4 cup fresh ricotta
3/4 pound pappardelle
1. Bring a large pot of water to a boil. Fill a bowl with ice water. When the water comes to a boil, salt generously and add the greens (you may have to do this in two batches). After the water returns to a boil, boil two to four minutes until the greens are tender. Using a deep-fry skimmer or slotted spoon, transfer them to the ice water. Do not drain the hot water in the pot, as you’ll use it to cook the pasta. Drain the greens, squeeze dry and chop.
2. Heat the oil over medium heat in a large, heavy nonstick skillet. Add the garlic, cook for about a minute just until fragrant, and stir in the greens. Toss in the hot pan for about a minute, just until the greens are lightly coated with oil and fragrant with garlic. Season with salt and pepper, and remove from the heat.
3. Place the ricotta in a large pasta bowl. Bring the water for the pasta back to a boil, and add the pappardelle. Cook al dente. Ladle 1/2 cup of the cooking water from the pasta into the ricotta and stir together. Drain the pasta, and toss with the ricotta, greens and cheeses. Serve at once.
Yield: Serves four.
Advance preparation: The greens, prepared through step 2, will keep for up to three days in the refrigerator.
Thursday, July 15, 2010
White House Gardens Weeks #4 & #5 2010

Week 4:
What happened to the rain? It’s been pretty miserable for all the vegetables, but the weeds love this hot, dry weather! Most of the garden is irrigated and the irrigation has been running non-stop since Sunday. I got a lot planted this past weekend. I hope it can survive this heat wave. Again, if anyone can spare an hour or two, there is a lot of weeding to be done. A few members will be volunteering early Sunday morning, starting at 7:30. We would love to have you join us.
In your share this week you will find:
Cucumbers I grow several varieties, and they are at their peak right now. I love cucumber salad made with vinegar and a little sugar. Slice the cucumbers thin (peeled or not), add a little onion, and salt them. Place them in a colander for about an hour and let them drain. Rinse and press or squeeze out the water. Make a dressing with vinegar, (I like rice wine vinegar) and a little sugar to taste. Toss the cucumber slices with the dressing, add a little diced hot pepper if you like it spicy. The amount of vinegar depends on how much cucumber you are using. Start with a tablespoon and add more if needed.
Carrots Kinko or Napoli are in your share. The Kinko are the short, stubby ones. These grew very nicely in some raised boxes that I filled with compost and soil.
Potatoes These are new, red potatoes, just dug Tuesday evening. (Thank you, Rick) They are not washed and are very thin skinned. I don’t wash potatoes because they last longer. Fresh dug potatoes are my favorite vegetable, there’s nothing like them. Below is a recipe courtesy of Michael Ruhlman, who writes a food blog I read. www.ruhlman.com These are his comments included in the recipe. I used parsley instead of tarragon.
Spring Potatoes with Tarragon and Chives
I love this technique for new potatoes. It takes advantage of the fresh herbs that are now in full bloom and can be made up to an hour before serving (gently reheat, serve warm, not piping hot). I believe it’s important to cook potatoes gently, so poach rather than boil (unless you’ve got hungry kids giving you the evil eye, in which case, boil away).
1 pound beautiful potatoes (any variety of thin-skinned potato)
2 ounce butter or to taste
plenty of salt, to taste
freshly ground black pepper
1 tablespoon fresh, lightly chopped tarragon
1 tablespoon minced chives http://ruhlman.com/
olive oil to taste (optional)
Cover the potatoes with water and bring to a simmer, then reduce heat to medium low; water can be at an infrequent bubble (just avoid rolling boil that knocks them around), 20-30 minutes.
When they’re tender (pierce with a knife, take one out and cut it and taste it if you’re unsure), strain them, allow them to cool till you can handle them and peel them (again, if you’re in a hurry, you don’t have to peel, they’re just better if you do). Cut them as desired.
Melt the butter in the same pan you cooked the potatoes in, add the salt and pepper, swirl, add the potatoes, stir gently to coat with butter, add the tarragon and chives, and stir to distribute the herbs. Taste. Add a tablespoon of very flavorful olive oil if desired, more salt if needed. Cover until ready to serve. Gently reheat if you want.
Onions These are young bulbing onions, also known as spring onions. Use them as you would dried, cured onions. You can even use the tops, like green onions.
Swiss Chard This is a green like spinach, with a little stronger taste. It is related to beets and has a similar taste. The leaves and the ribs can be eaten, but the ribs take longer to cook than the greens. Here is my favorite way to enjoy Swiss chard:
Creamed Swiss Chard With Prosciutto
This recipe is one of my sister’s favorites. You can use prosciutto, pancetta, or bacon. They all work great.
2 T. olive oil
¼ cup diced prosciutto
¼ cup minced yellow onion
1 T. minced garlic
8 cups chopped Swiss chard leaves (you can use the stems also, separate them from the leaves and cook the stems first, then add the leaves)
1/3 heavy cream
Salt and pepper as needed
¼ cup grated Parmesan cheese
¼ t. grated nutmeg
Heat olive oil in a large sauté pan over medium heat. Add the prosciutto and sauté until aromatic, about 1 minute. Increase the heat to high and add the onion and garlic. Saute, stirring constantly, until the garlic is aromatic, about 1 minute more.
Add the Swiss chard, sautéing just until the leaves wilt, about five minutes. Add the heavy cream and bring to a simmer. Cook the Swiss chard until it is tender, about 5 minutes.
Season generously with salt and pepper. Remove from heat and stir in the Parmesan and nutmeg. Serve immediately in a heated bowl or on heated plates.
Beets Chioggia and red beets are in your bunch. The Chioggia are also called Candy Stripe Beets. I thought I didn’t like beets until I tried baking them. Wrap the beets in a foil pouch and bake at 400 degrees for about an hour. Smaller beets will take less time, and larger ones may take more. When they are tender, remove from the oven and let cool until you can handle them. Peel, slice or cut up the way you like. Toss with olive oil, any vinegar you like, and salt and pepper. Wonderful salad! The roots will store longer than the greens, so remove the greens and store separately. The greens can be sauted just like the Swiss chard, or add them to the chard recipe.
Zucchini It keeps on growing!
Parsley and Chives Use these in the potato recipe!
WEEK 5:
I have been pickling many vegetables this year. Asparagus, cauliflower, and now cucumbers. Many vegetables can be preserved by pickling and my goal is to try as many as I can. The asparagus was a success. The cauliflower and pickling cucumbers need to age a bit before trying them. In your share this week you have a lot of cucumbers! Make some cucumber salad (recipe in last week’s newsletter). It is very refreshing on a hot day. Or make shareholder Pat Brannon’s refrigerator pickles. The recipe is in the newsletter. Not all of you got pickling cucumbers. They are the short, fat ones. I put enough in your share, if you got them, to make the refrigerator pickles or another one, if you like. If you didn’t get pickling cucumbers, then you got shelling peas. The peas are just starting to ripen, there will be more later if the heat doesn’t reduce their flowering.
Cucumbers Slicing and/or pickling cucumbers.
Zucchini/Summer Squash Here is a link to a blog I read, “Well Preserved” by Eugenia Bone, who writes for the Denver Post. http://blogs.denverpost.com/preserved/2010/07/13/what-to-do-with-all-that-zucchini/ She has some very good ideas for using all the zucchini. Eugenia has also written a book “Well Preserved” that I purchased and have tried her recipes for pickled asparagus and cauliflower. I particularly want to try the zucchini fritters she mentions in the blog. Many people may wonder why there is so much zucchini sometimes. The trouble with growing zucchini is you can have a bad year (like I did last year) and then there is very little. So, we farmers plant more, and then a good year comes along and we are overrun with the stuff!
Red Cabbage The heads of cabbage got huge with all the rain. I love braised red cabbage and have included a recipe in the newsletter.
Lettuce Two varieties this week, Green Ice and Red Fire
Red Onions These are young onions before they are fully developed. Use like regular cured or dried onions, but they must be stored in the refrigerator. Use the green part just like green onions.
Shelling Peas Just a few of you received a pound of shelling peas. These are great lightly steamed and tossed with butter and any herbs you have on hand.
Dill Add to potato salad or boiled potatoes, a salad, or your favorite pickle recipe!
Grandma’s Refrigerator Pickles
7 cups thinly sliced cucumber
1 cup thinly sliced onion
1 cup thinly sliced green pepper
Sprinkle 2 tablespoons pickling salt and ½ tsp. celery seed over the sliced vegetables
Mix together 1 cup white vinegar and 2 cups sugar (I cut the sugar)
Pour over and mix through.
Put in a large container or bowl in the refrigerator and stir once daily for three days, then enjoy! Store in smaller containers or freeze. Make sure you leave a little headroom in the freezer container for expansion.
This recipe came from a German friend, Gertrude. I watched her make it and took notes. She does not have a written recipe for this. She’s made it so many times (she is in her eighty’s), that she knows it by heart. All measurements are approximate. She couldn’t give me exact quantities. She said it depends on the cabbage, the weather, and your mood I guess!
Braised Red Cabbage
Quarter and core a medium head of red cabbage. Slice it as thin as you can. Toss with 1 tsp. salt and let stand in a colander over a bowl for a minimum of one hour or up to 4 hours, until the cabbage wilts. Chop an onion and sauté it in 1 Tbsp. of oil until wilted. Add the cabbage, salt & pepper, and toss to combine. Simmer the cabbage on low heat, covered, about 30 minutes, or until tender. Add water, 1 Tbsp. at a time if needed. Add about 3 Tbsp. of cider vinegar, more or less to taste, and simmer another 30 minutes. Taste and add more vinegar if desired. Add about 1 Tbsp. of flour to bind all together, and more water if too dry. Continue simmering until tender if needed.
Subscribe to:
Posts (Atom)
